5 Winter Rock Identification Projects for Indoors: Fun Ideas for Rockhounds
Winter can be a tough time for rockhounds. Cold weather, snow, and icy ground can make outdoor rock hunting nearly impossible. But the fun doesn't have to stop just because it's chilly outside! With a few simple tools, some rock samples, and a cozy indoor space, you can explore the exciting world of rock identification right at home. Indoor rock projects can be fun and easy, and they'll keep your rockhounding skills sharp all winter long. Ready to become a rock detective?
Let's dive into five exciting and beginner-friendly projects that will make you a winter rock expert in no time.
5 Exciting Indoor Rockhounding Activities
Setting Up Your Indoor Rock Identification Workspace
Before jumping into these fun rock projects, let's get your space set up! Having a special place to examine your rocks makes it feel more like an adventure and keeps things organized. Setting up an indoor workspace also means you can keep tools and rocks together and easily work on these projects whenever you like.
Creating Your Rock Lab
- Choose a Small Table: Pick a small table or desk you can keep clean and free from other things. Cover it with a cloth to protect it from scratches.
- Get Some Good Lighting: A bright lamp is perfect for seeing small details on rocks. If possible, work near a window during the day so you can see your rocks under natural light.
- Organize Tools in a Box: Place all your rock identification tools (we'll go over these next!) in a box or container so they're easy to grab.
Basic Tools for Rock Identification at Home
- Magnifying Glass or Hand Lens: To see all the tiny details on your rocks, you'll need a magnifying glass. You can get a hand lens for even better magnification.
- Household Items for Hardness Testing: Items like a penny, a nail, or a piece of glass can help test the hardness of a rock. (We'll cover how to do this in Project 2!)
- Unpolished White Ceramic Tile: Useful for testing the color of a rock's powder, also known as the "streak test."
- Identification Guide or App: A guidebook or rock identification app will help you look up rocks by their colors, shapes, and patterns.
- Notebook for Rock Log: Use a notebook to keep track of your findings, just like a real rockhound scientist!
Now that you're all set up, let's start exploring these rock identification projects that will turn you into a rock expert by spring!
Project 1: Observation and Basic Identification with a Hand Lens
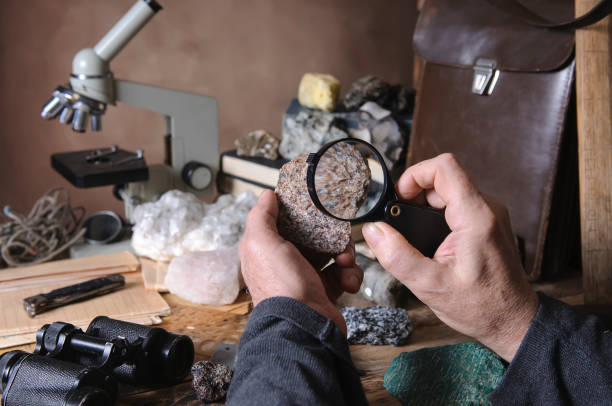
The first and easiest way to start identifying rocks is by just looking at them carefully. You'd be amazed by what you can discover just by observing with a good magnifying glass or hand lens!
Steps for Observation and Identification
- Hold the Rock in Your Hand: Take one of your rocks and look at it in natural light. Notice its color, size, and shape.
- Use Your Magnifying Glass: Look closely at the rock's surface. Can you see tiny crystals or grains? These are clues about what kind of rock it is.
- Describe Its Texture: Does the rock feel smooth, grainy, or glassy? Write down the texture in your notebook.
- Check for Shine or "Luster": Some rocks shine like metal, while others are dull or sparkly. Try to find out if your rock has a metallic shine (like a spoon) or a non-metallic shine (like glass).
Why Observation Matters: Just like a detective notices small clues, looking closely at a rock gives you important information. Knowing its color, texture, and luster can help you decide if it's an igneous, sedimentary, or metamorphic rock. Keep practicing-this is your first step to becoming a rock expert!
Project 2: Hardness Test Using Household Items
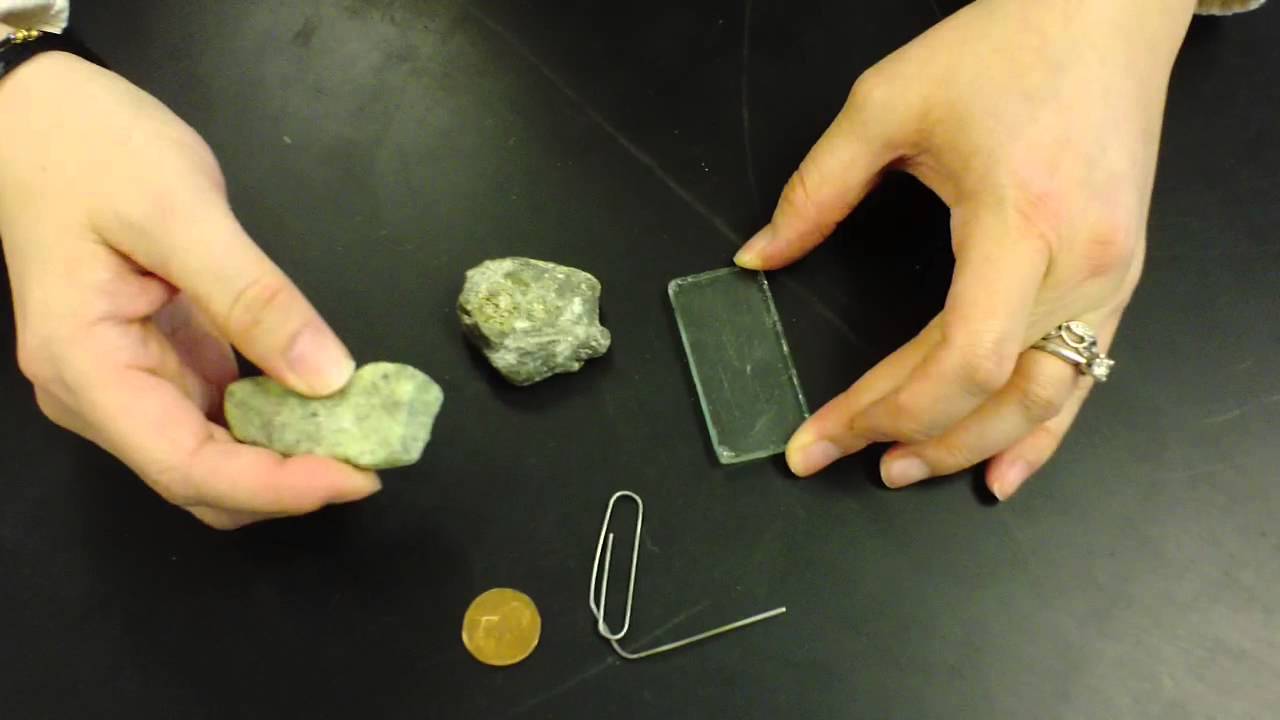
Have you ever wondered why some rocks can scratch others? That's because rocks have different "hardness." The hardness of a rock is how tough or scratchable it is, and it's super helpful in identifying rocks. You can use things from around the house to do your own hardness test!
Steps for a Simple Hardness Test
- Pick a Rock Sample: Choose a rock you want to test.
- Try Scratching It with a Penny: Rub the edge of a penny against the rock. If the penny leaves a mark, the rock is softer than the penny.
- Try a Steel Nail or Piece of Glass: If your rock doesn't scratch with the penny, try with a nail or glass. If the rock gets scratched, it's not as hard as the nail or glass.
Write down which items could and couldn't scratch the rock. Knowing your rock's hardness can help you tell if it's a mineral like talc (very soft) or quartz (harder).
Project 3: Streak Test on a Ceramic Tile
The color of a rock isn't always what it seems. Sometimes, when you scratch it on a tile, it shows a different color. This powder color is called the "streak," and it's a neat trick for identifying certain rocks and minerals.
How to Do a Streak Test
- Get an Unglazed Ceramic Tile: These are easy to find and very useful for rock identification.
- Rub the Rock Against the Tile: Press one edge of the rock on the tile and drag it across. It should leave a streak of powder.
- Observe the Color of the Streak: The streak might be different from the color of the rock itself. Write down this streak color in your rock notebook.
For example, minerals like hematite leave a reddish streak, even if the rock looks dark or metallic on the outside. This is one of the coolest indoor rock identification projects because it feels a little bit like magic!
Project 4: Acid Test for Carbonate Minerals
This test lets you find out if your rock contains carbonate minerals like calcite. When you place acid on a carbonate rock, it fizzes, which is pretty exciting to watch! For a safe acid test, you can use vinegar, which is a mild acid that works perfectly for testing rocks.
How to Perform an Acid Test
- Put on Gloves and Safety Glasses: Even with vinegar, it's smart to protect your hands and eyes.
- Place a Drop of Vinegar on the Rock: Use a small dropper to put one drop of vinegar on the rock.
- Look for Fizzing: If you see tiny bubbles forming, it means the rock likely has carbonate minerals in it!
Write down your findings. The fizzing reaction happens because carbonate minerals react with acid to release gas bubbles. Rocks like limestone will usually fizz, which is a fun way to confirm you've found a carbonate rock!
Project 5: Using a Rock Identification App or Guidebook

Now that you've made some amazing observations, it's time to bring in some technology to help identify your rocks. Many apps and guidebooks make it easy to compare your notes to descriptions and pictures of different rocks and minerals. This project is perfect if you want some extra guidance and confirmation.
How to Use an App or Guidebook
- Take a Clear Photo of Your Rock: This is important if you're using an app. Good lighting will help the app pick up details.
- Use the App to Compare Your Rock: Some apps allow you to take a photo and give you suggestions for what the rock could be.
- Check in a Guidebook: If you have a guidebook, look for the rock section that matches your observations (color, hardness, streak, etc.).
Using an app or guidebook lets you confirm what you've already learned and can give you more confidence in identifying rocks on your own. Plus, it's fun to see if you were right!
Tips for Keeping a Rock Log
Keeping a "rock log" will make you feel like a true geologist and will help you remember all the cool rocks you've studied. Here's how to set up a rock log and why it's helpful.
How to Keep a Rock Log
- Give Each Rock a Name: This could be a number or even a creative name like "Shiny Black Mystery Rock."
- Write Down Observations: Include everything you observed in the other projects (color, hardness, luster, streak, acid test results).
- Take Photos of Each Rock: A picture will help you remember what each rock looks like.
Your rock log will become a little book of your discoveries, and you can always look back on it. You'll be surprised by how much you learn!
Conclusion: Winter Rock Identification Adventures Await!
Winter is the perfect time to try indoor rock identification projects and level up your rockhounding skills! With just a few tools and a little creativity, you can turn your home into a rock lab and dive into the amazing world of geology without even stepping outside.
Want to learn even more rockhounding secrets? There's a whole world of tips, tricks, and resources at rockhounding.org waiting to help you become a rock expert! When spring finally arrives, you'll be ready to explore and identify rocks with new confidence. Don't miss out on the fun-start your winter rock adventures today!