Creating Stunning Gemstones: Creative Tips and Tricks in Rock Tumbling and Polishing
Have you ever stumbled upon a seemingly ordinary rock and imagined the hidden beauty waiting to be revealed? Or have you ever seen a gemstone so attractive and sparkling, and wondered how it got its beauty?
In this article, we will unravel the secrets behind those beautiful gemstones you see at jewelry stores, rockhounding exhibitions and shows, etc. You will learn how to turn seemingly ordinary rocks into magnificent gemstones using a rock tumbler, what kind of rocks to choose, and what steps to follow to achieve the best results.
Rock tumbling and polishing is a captivating hobby that transforms ordinary stones into dazzling gemstones. This step-by-step guide explores creative tips and tricks to help you elevate your rock tumbling experience and achieve stunning results. Whether you're a beginner or an experienced enthusiast, these techniques will add an artistic flair to your gemstone creations.
Let's begin with the very basics:
What is Rock Tumbling and Polishing?
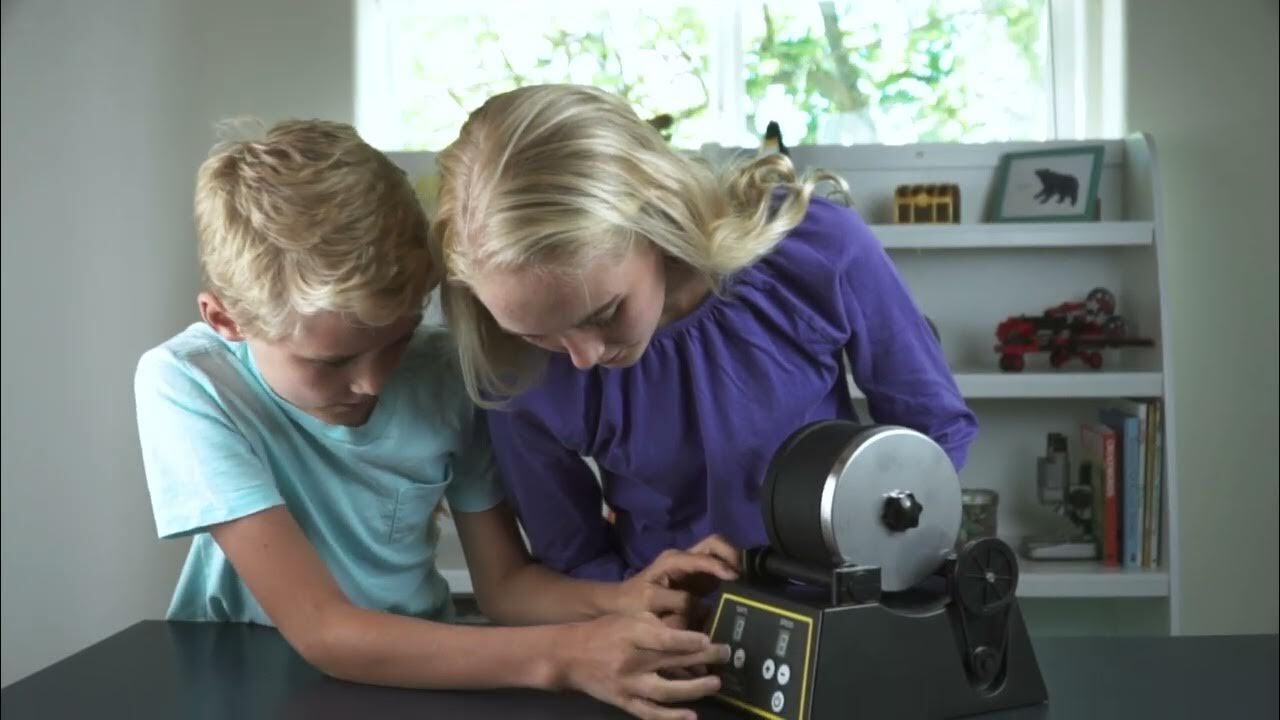
Rock tumbling and polishing is the process of smoothing and shining rocks and minerals using a machine called a rock tumbler. A rock tumbler is a device that rotates a barrel filled with rocks, abrasives, and water. The abrasives, also known as grit, are particles of different sizes and hardness that grind against the rocks and remove the rough edges and surface imperfections. The water acts as a lubricant and helps to wash away the debris.
The process usually involves four stages, each with a different type of grit, from coarse to fine. The final stage is polishing, where a very fine grit or compound is used to give the rocks a glossy finish.
The Steps in Rock Tumbling
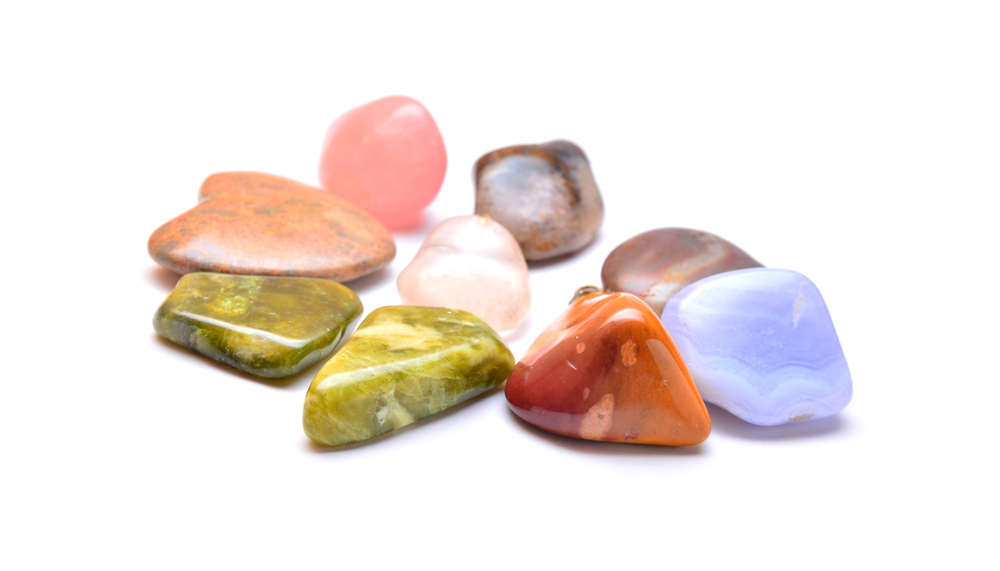
- Unearth Your Treasures: The first step is to gather your raw materials. Head to rivers, beaches, or rock quarries (always with permission) to hunt for potential gems. Look for rocks with interesting colors, patterns, or textures. Igneous rocks like granite and basalt, and metamorphic rocks like marble and quartzite, tumble beautifully. Avoid sedimentary rocks like sandstone or shale, as they tend to crumble.
- Prepare Your Gemstones: Once you've collected your rocks, sort them by size and hardness. Rocks of similar sizes will tumble more evenly, and harder rocks require different grit sequences than softer ones. Wash your rocks thoroughly to remove dirt and debris, and check for cracks or fractures that could worsen during tumbling.
- The Tumbling Transformation: The heart of rock tumbling lies in a rotating barrel filled with abrasive grit and water. This relentless dance polishes the rough edges and surfaces of your rocks, gradually revealing their inner beauty.
Tips and Tricks for Rock Tumbling and Polishing
Here are some tips and tricks to help you get the most out of your rock tumbling and polishing experience:
-
Choose the right tumbler for your needs
There are different types and sizes of rock tumblers available, from small and simple models to large and professional ones. Consider the amount and type of rocks, space, noise level, and budget. You can also opt for a rock tumbling kit that includes everything you need to get started, such as a tumbler, rocks, grit, and instructions.
Here are some of the top-rated rock tumblers online for beginners and advanced users, and also based on your budget.
- For Beginners: I recommend the National Geographic Hobby Tumbler. This tumbler is easy to use, durable, and comes with everything you need to start tumbling, such as rocks, grit, and a learning guide. It also has a rubber barrel that reduces noise and a timer that automatically shuts off the tumbler.
- For Advanced Users: I recommend the Lortone 3A or the Tumble-Bee TB-14. Both of these tumblers are high-quality, reliable, and long-lasting. They have a metal barrel that can handle harder and larger rocks and a powerful motor that can run for weeks.
- For Budget-Conscious Users: I recommend the KoolStone Brushless Motor Rock Tumbler Kit or the KoolStone Large 2.5LB Professional Rock Tumbler Kit. Both of these tumblers are affordable, efficient, and versatile. They have a brushless motor that saves energy and reduces noise and a digital display that shows the speed and time settings. They also come with a variety of rocks, grit, and accessories.
-
Experiment with different rocks and grits
Tailor your tumbling media to achieve specific finishes. Combine different types of abrasive grits to achieve a smoother surface or emphasize natural patterns.
You can mix and match different types and colors of rocks, as long as they have similar hardness and size. You can also vary the amount and type of grit you use, and the duration of each stage, to achieve different effects. For example, you can use less coarse grit and more fine grit to get a smoother and rounder shape, or you can use more coarse grit and less fine grit to get a more angular and textured shape.
Experiment with ceramic pellets, plastic beads, or crushed walnut shells to add texture during the polishing stages. The possibilities are endless, so have fun and experiment!
-
Enhancing Vibrant Colors
To enhance the natural colors of your rocks, consider using a pre-polish stage. Infuse your rocks with vibrant hues!
Experiment with tumbling dyes or soak them in mineral solutions before the final polish to add pops of color or enhance natural patterns. Use oxide polishes like cerium or aluminum to bring out vibrant hues. Adjust the tumbling time and polish selection to achieve the desired color intensity.
-
Keep a record of your batches
Rock tumbling and polishing is a long and gradual process that can take weeks or months to complete. It can be hard to remember what rocks and grits you used, and how long each stage took, especially if you have multiple batches going on at the same time.
To avoid confusion and frustration, it is a good idea to keep a record of your batches, either on a notebook, a spreadsheet, or a label on the barrel. You should write down the date, the type and amount of rocks, the type and amount of grit, the amount of water, and the duration of each stage. You can also take pictures of the rocks before and after each stage to see the progress and compare the results. This will help you keep track of your batches, learn from your mistakes, and improve your skills.
-
Be patient and enjoy the process
Rock tumbling and polishing is not a quick and easy hobby. It requires patience, dedication, and attention to detail. You may encounter some challenges, such as broken or chipped rocks, scratched or dull polish, or noisy or leaking tumblers. You may also feel tempted to rush the process or skip some steps to get faster results. However, you should remember that rock tumbling and polishing is a rewarding and satisfying hobby that can produce amazing results if you follow the instructions and take your time.
You should enjoy the process of transforming ordinary rocks into beautiful gemstones and appreciate the beauty and uniqueness of each rock. Rock tumbling and polishing is a hobby that can bring you joy, relaxation, and creativity.
Other Rock Tumbling and Polishing Tips
- Creating Intricate Patterns: Explore advanced techniques for creating intricate patterns on your gemstones. Mask certain areas of the rock with tape or wax before tumbling to create patterns or reveal contrasting layers during the polishing process.
- Incorporating Water Features: Introduce water features into your tumbling process to create unique effects. Adjust the water levels during the tumbling stages to experiment with matte finishes, water-polished textures, or to highlight specific features of the rocks.
- Textural Delights: Don't just polish, texture! Use coarse grits to create a matte, antiqued finish, or experiment with tumbling media like ceramic pellets or crushed gemstones for unique textures and patterns.
- Layered Polishing Techniques: Experiment with layered polishing techniques to achieve a multi-dimensional effect. Utilize different types of polish and adjust the polishing time to create layers that catch the light in various ways.
- Adding Luster with Burnishing: Burnishing involves using a soft material like leather or fabric in the final polishing stages. This technique adds a lustrous sheen to the gemstones and brings out a glossy, polished finish.
- Utilizing Vibratory Tumblers: Vibratory tumblers provide an alternative method to rotary tumblers and are particularly effective for certain types of rocks. Explore the advantages of vibratory tumblers in achieving unique finishes and enhancing the overall quality of your gemstones.
How to Use a Rock Tumbler
To use a rock tumbler, you will need the following materials:
- A rock tumbler or a rock tumbling kit
- Rocks or minerals of your choice
- Grit of different sizes and types
- Ceramic media filler or plastic pellets
- Water
- A toothbrush
- A strainer or a colander
- A towel or a paper towel
- A container or a bag for storing the rocks
Here are the steps to follow for using a rock tumbler:
- Choose your rocks: The best rocks for tumbling are hard, dense, and free of cracks or fractures. Some examples are agate, jasper, quartz, and petrified wood. You can find rocks in nature, at rock shops, or online. Try to choose rocks of similar hardness and size, as they will tumble more evenly and reduce the risk of breaking or chipping.
- Wash your rocks: Before adding them to the tumbler, you should wash your rocks with water and a toothbrush to remove any dirt or dust. This will help the grit to work more effectively and prevent contamination.
- Fill the barrel: Add your rocks to the barrel until it is about 2/3 to 3/4 full. Do not overfill or underfill the barrel, as this will affect the tumbling action and the quality of the results. If you have some space left in the barrel, you can add some ceramic media filler or plastic pellets to act as a cushion and improve the tumbling. These fillers can also help to polish the rocks in the final stage.
- Add the grit and water: For the first stage, you will need to add coarse grit, which is usually 60/90 or 80/100 mesh. The amount of grit depends on the size and type of your tumbler, but a general rule is to use about 1 tablespoon of grit per pound of rocks. Then, add water to the barrel until it reaches just above the level of the rocks. Do not add too much water, as this will dilute the grit and reduce its effectiveness. You can also add a little bit of powdered dish soap to the water to help prevent the grit from sticking to the rocks and improve the grinding action.
- Seal the barrel and start the tumbler: Please make sure the lid of the barrel is tightly secured and place it on the tumbler. Turn on the tumbler and let it run for 24 hours. You can check on the progress of the rocks by opening the barrel and rinsing them with water. You should see some changes in the shape and smoothness of the rocks after the first day. However, the first stage usually takes 7 to 10 days to complete, depending on the hardness and size of the rocks. You will know when the first stage is done when the rocks have no sharp edges or cracks and have a uniform shape and smoothness.
- Clean the rocks and the barrel: Once the first stage is done, you will need to clean the rocks and the barrel thoroughly. Use a strainer or a colander to separate the rocks from the grit and water. Rinse the rocks with water and a toothbrush to remove any traces of grit. Dry the rocks with a towel or a paper towel and store them in a container or a bag. Do not discard the grit and water, as you can reuse them for another batch of rocks. Clean the barrel and the lid with water and a brush to remove any residue of grit. Make sure the barrel and the lid are completely dry before using them again.
- Repeat the process with finer grits: For the second, third, and fourth stages, you will need to repeat the process with finer grits, such as 120/220, 500, and 1000 mesh. The amount of grit and water is the same as in the first stage, but the duration of each stage is shorter. The second stage usually takes 5 to 7 days, the third takes 4 to 6 days, and the fourth takes 3 to 5 days. You will notice that the rocks become smoother and shinier with each stage. You should always clean the rocks and the barrel between each stage to prevent contamination and scratching.
- Polish the rocks: For the final stage, you will need to polish the rocks with a very fine grit or a compound, such as aluminum oxide, cerium oxide, or tin oxide. The amount of polish depends on the type and size of your tumbler, but a general rule is to use about 2 teaspoons of polish per pound of rocks. You can also add some ceramic media filler or plastic pellets to the barrel to help with the polishing. Add water to the barrel until it reaches just below the level of the rocks. Do not add any dish soap to the water, as this will interfere with the polishing. Seal the barrel and start the tumbler. Let it run for 5 to 7 days, checking on the progress of the rocks every day. You will see that the rocks become glossy and reflective with the polish. When the rocks have reached the desired level of polish, you can stop the tumbler and clean the rocks and the barrel as before.
- Enjoy your gemstones: Congratulations, you have successfully turned ordinary rocks into stunning gemstones! You can now admire your polished rocks, display them in a bowl or a jar, or use them for other projects, such as jewelry making, wire wrapping, or mosaic art. You can also give them as gifts to your friends and family, or sell them online or at craft fairs.
Safety Tips in Rock Tumbling and Polishing
Rock tumbling and polishing is a fun and rewarding hobby, but it also involves some risks and precautions. Here are some safety tips to follow when you are tumbling and polishing rocks:
- Wear protective gear: Rock tumbling and polishing can produce dust, noise, and heat that can be harmful to your eyes, ears, and skin. You should wear safety goggles, earplugs, gloves, and a mask when you are handling the rocks, the grit, and the tumbler. You should also work in a well-ventilated area and avoid inhaling or ingesting the dust or grit.
- Clean the rocks and the barrel: Before and after each stage of tumbling and polishing, you should thoroughly clean the rocks and the barrel with water and a brush. This will prevent contamination, scratching, and clogging of the grit and the polish. You should also rinse the rocks with water and a toothbrush to remove any traces of grit before moving them to the next stage or the polishing barrel.
- Use the right amount of grit and water: Follow the instructions that came with your tumbler or the grit for the amount and type of grit and water to use for each stage. Do not use too much or too little grit or water, as this will affect the quality and efficiency of the tumbling and polishing. Also, use powdered dish soap to help prevent the grit from sticking to the rocks and improve the grinding action.
- Use a different barrel for polishing: To avoid ruining the polish on your rocks, you should use a separate barrel just for the polishing stage. This will ensure that there is no leftover grit from the previous stages in the barrel. Label each barrel to avoid mixing them up.
- Use a plastic bin or a tray: Rock tumbling and polishing can be messy, especially if the barrel leaks or breaks. To prevent spills and stains, you should place your tumbler in a plastic bin or a tray that can contain the liquid and the debris. Check the barrel regularly for any cracks or leaks and replace it if needed.
- Store the rocks and the grit properly: After you finish tumbling and polishing your rocks, store them in a dry and cool place, away from direct sunlight and heat. You should also keep them in a container or a bag to protect them from dust and scratches. You can reuse the grit and the water for another batch of rocks, but you should store them in a sealed container or a bottle and label them with the type and size of the grit.
Conclusion
Rock tumbling and polishing offer a world of creative possibilities. By incorporating these tips and tricks into your process, you can elevate your gemstone creations to new heights.
Remember rock tumbling and polishing is a journey of discovery, exploration, and endless possibilities. Embrace the experimentation, celebrate the surprises, and let your creativity guide you as you transform ordinary rocks into extraordinary gemstones. So, grab your tumbler, unleash your inner alchemist, and get ready to witness the magic of turning pebbles into dazzling works of art!
BONUS!
If you want to see a practical video on rock tumbling and polishing, you can check out this video Rock Tumbling Tutorial for Rotary Tumblers and Ceramic Media by Michigan Rocks.
Happy Tumbling!